c. In the
Spot Color Handling
list, select
Output Separately
.
The options available in the
Spot Color Handling
list depend on
the output type.
d. Select the
Always Use Color Combiner to Convert Spots
check
box, if it is available.
e. Close the process template.
4. If you want to reduce individual spot colors, use the Color Output
dialog box:
a. In the Start Process dialog box, click
Color Mapping
.
The Color Output dialog box appears.
b. If you want to add or change a color in the
Page Color
column,
see Adding or Changing Colors.
c. Select the spot color that you want to affect and then set the
Output Selected as
list:
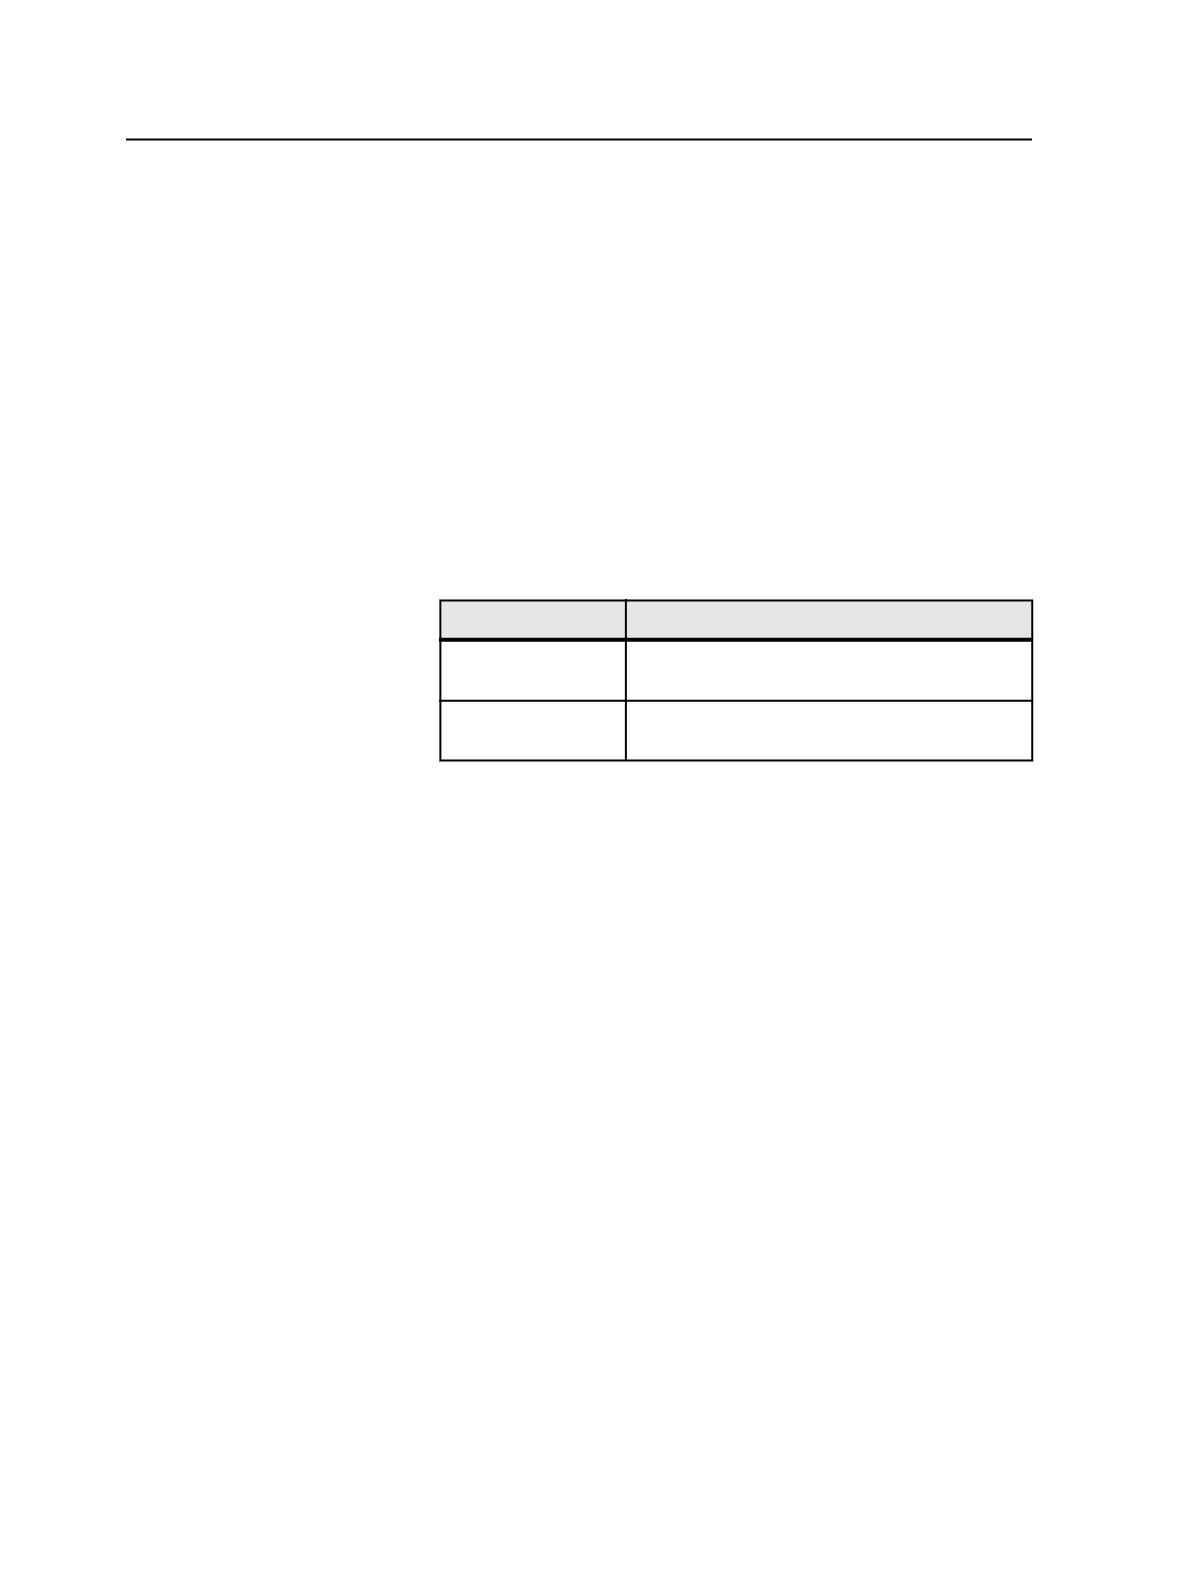
To
Do This in the Color Output Dialog Box
Convert a spot color
to process color
In the
Output Selected as
list, select
Convert to
Process
.
Omit a spot color
from the proof
In the
Output Selected as
list, select
Do Not
Output
.
d. If necessary, repeat steps b and c for other spot colors that you
want to reduce.
e. Click
OK
.
5. Click
OK
to close the Start Process dialog box.
The proof process occurs, applying the settings of both the loose
page output process template and the Color Output dialog box. The
proof is generated.
Tip:
●
This procedure works only with raster files, not with vector files.
●
You can modify and save the process template before you start. Start the
process using the modified process template, and do not click
Edit Process
Template
in the Start Process dialog box.
●
You can also use this procedure to omit a process color from a proof. Instead
of selecting a spot color in the Color Output dialog box, select a process color
and set the
Output Selected as
list to
Do Not Output
.
●
To quickly set several colors to the same setting in the Color Output dialog
box, select them all and then select an option in the
Output Selected as
list.
●
If you edit the process template from the Start Process dialog box and use the
Color Output dialog box, the most recently applied settings take precedence.
820
Chapter 14—Color


